At the end of part 1 of this series, I mentioned:
“While the mold for the bonsai pot is not that hard to make, there is quite a bit of prep work (screwing and un-screwing, caulking, gluing foam etc.) and as it is made of melamine (MDF) I know it won’t last long. Maybe two or three uses maximum, then I need to make a new one. And, for every shape you want to make, you need to create a new mold. There must be a better way … and there is … and yes … I will share that too!”
As promised, what follows is the solution I came up with. A configurable mold! Here is an example of what I have been able to build using it.
I have taken a lot of pictures to illustrate how it works. I hope they will be of benefit to you if you want to build concrete pots or concrete troughs. I have captioned all of the images so you can read this as a slide show if you like. Just click on the image below and use the pause button which you will see at the top right of the image.
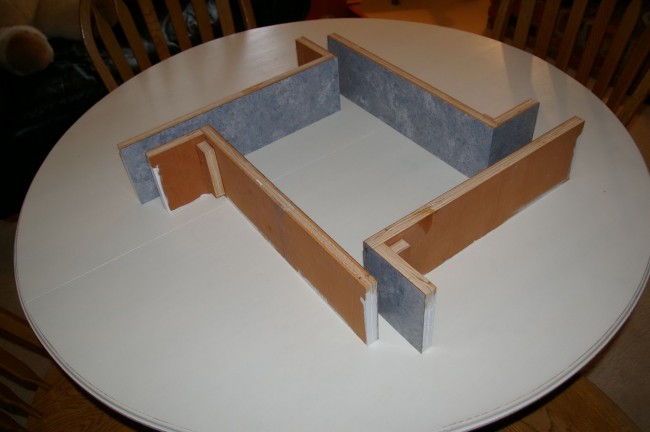
The mold consists of 4 L-shaped pieces made from plywood and covered with a smooth laminate. These can be slid into any number of square or rectangular shapes limited only by the length of the pieces.

Once you have the shape you want, you simply clamp the pieces together like this.The stronger the clamps, the better the seal you will get where they join.
First Pot!
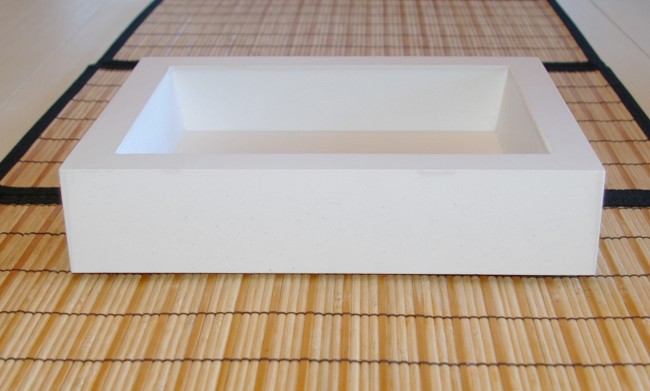
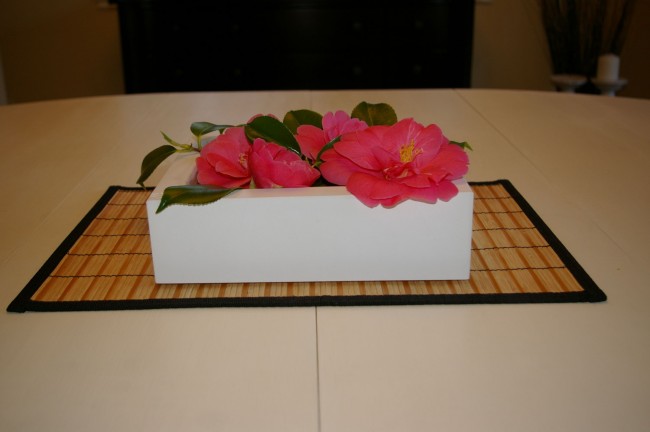
My first use of this mold was to make a square(ish) pot with no drainage holes that could be used to float flowers.
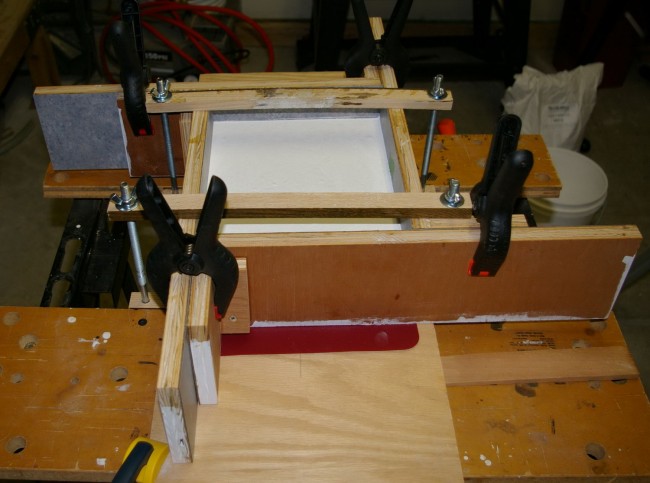
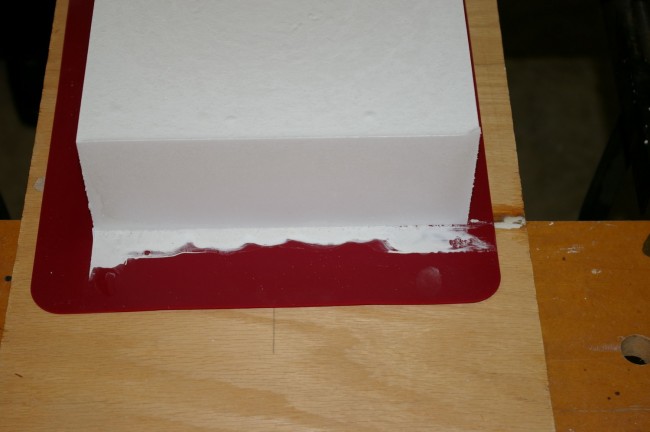
Here is an example of the mold which is clamped down to the silicone cookie sheet. In this image you can see the concrete has been poured into the mold. A block of foam (not shown) will act as the cavity. This is better illustrated in the next section, on a trough I built.
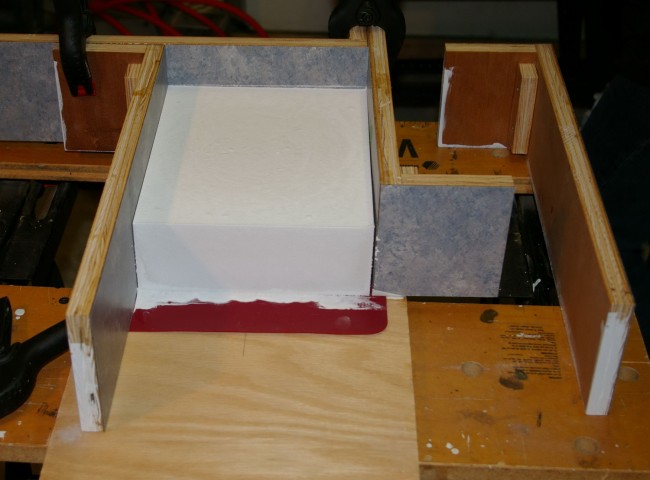
Once the concrete has set, simply un-clamp the sides to free the concrete from the mold. You can see that there is a tiny bit of leaking on the bottom edge of the mold (on the silicone sheet) but this is paper thin and easily removed with an Exacto knife.
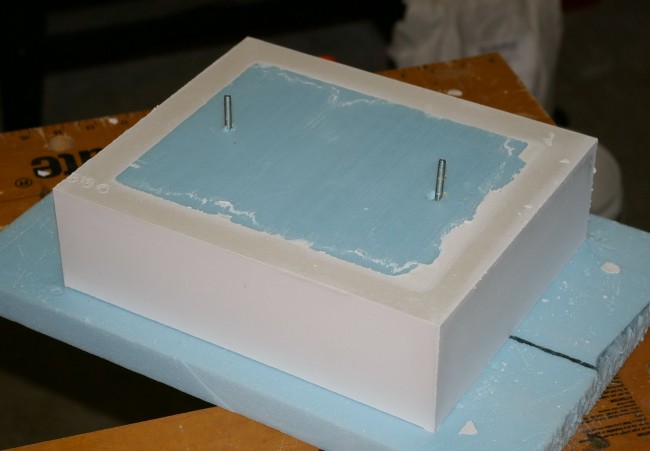
Here is the piece flipped over, revealing the foam block and the 2 screws which held it down through the silicone cookie sheet.
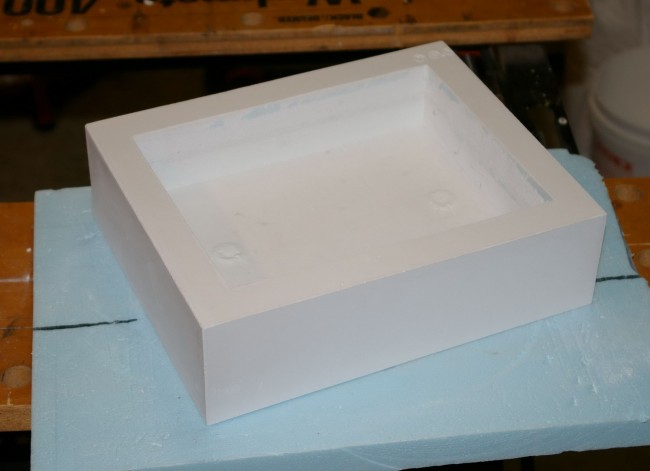
In this picture, the foam block has been cut away and the edges ‘gently’ sanded to remove the burs. The inside will also get a gentle sanding to remove the blue foam residue.
A Trough
My second pour was to make a rectangular trough, again with no holes and thinner walls. This one was built as a gift for my daughters friend, Jess and she gave me the dimensions she wanted.
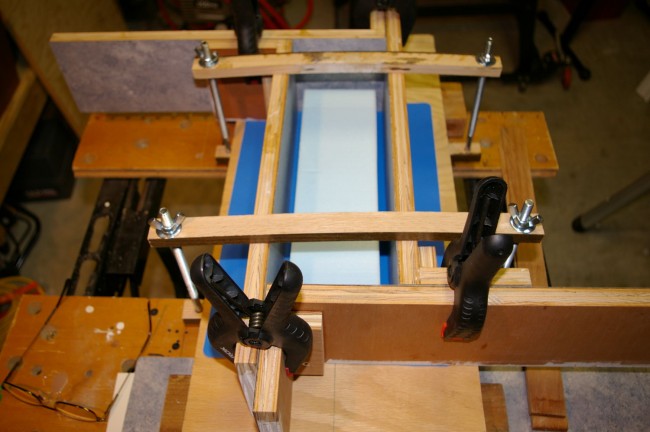
Again, the mold is clamped together and clamped down, and this time you can see the foam block which will form the cavity.
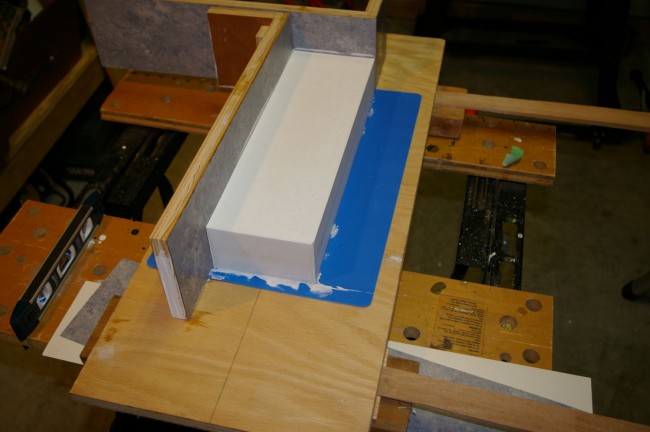
After the concrete has set, the mold is un-clamped. Again, you can see a bit of leaking, but as before, it’s paper thin.
A Bonsai Pot
My third use of the mold was to make a bonsai pot. It’s very similar to the ones I made in part 1 and part 2 but as you will see, it is greatly refined. This piece was built as a gift for my daughter Robin and to her specifications. One major difference with this one is that rather than using foam for the cavity, I used a block of wood which was made by laminating 2 old pieces of oak and then asking my most excellent friend Garry C. to cut it and plane it in his workshop. I then gave it four coats of paint. Also, because this pot needs drainage holes and feet, a few more bits and pieces are required.
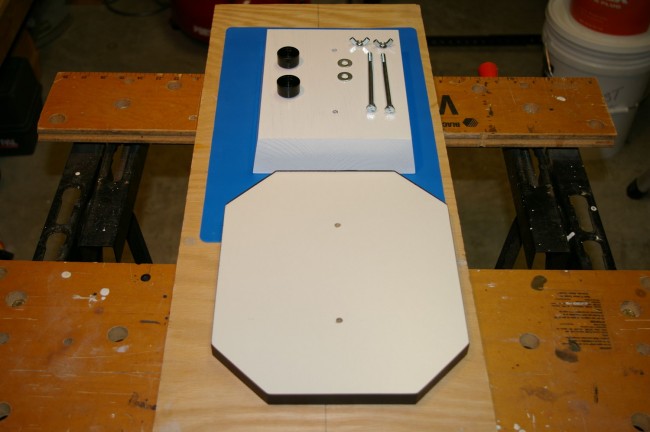
Here are the parts I used: 2 plastic chair leg caps, 2 washers, 2 bolts, 2 wing nuts, the wood plug that Garry made and a piece of wood with the corners cut off to form the feet.
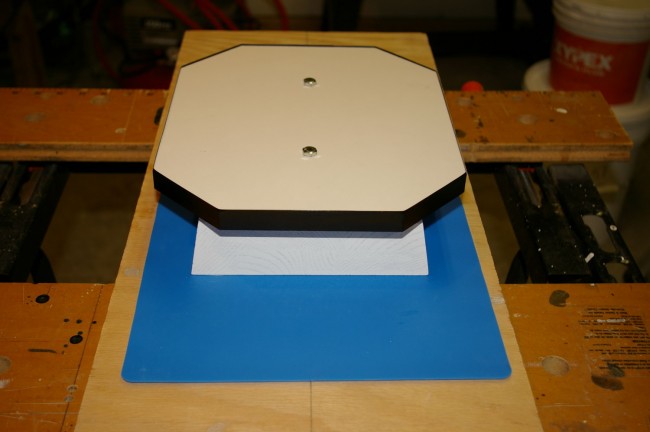
Here is a view of the whole thing assembled and bolted down through the silicone cookie sheet and the plywood below.
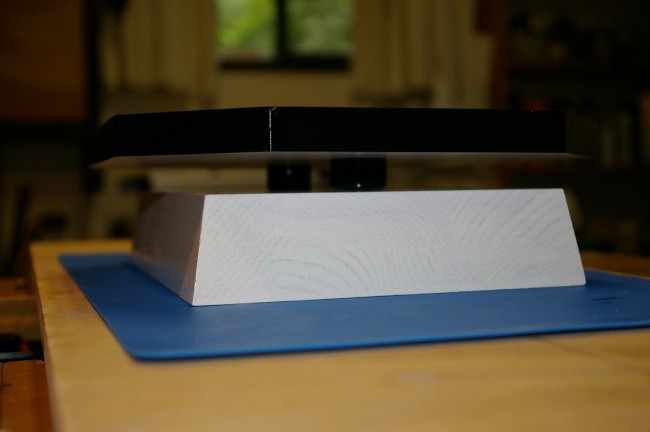
A view from the side. You can see the plastic leg caps between the plug and the top. The edge of the top piece has 2 wraps of electrician’s tape to protect the edge and also to help form a tighter seal inside the configurable mold.
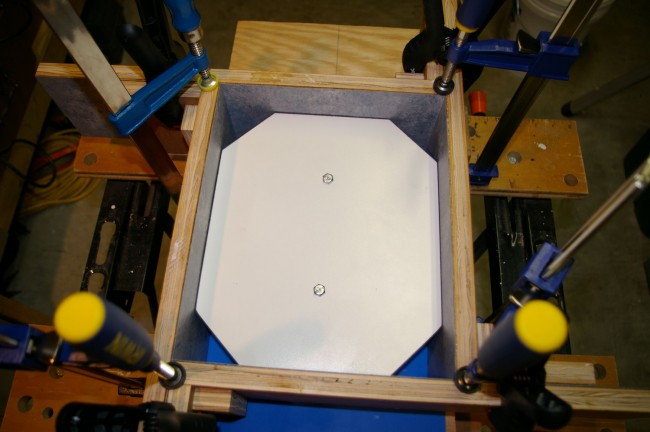
The configurable mold has now been placed around it, clamped together and clamped down to the silicone cookie sheet. Note that I used different clamps this time to clamp it down. These clamps worked really well for this pot! NOTE: The concrete will be poured through the triangular holes on the corners.
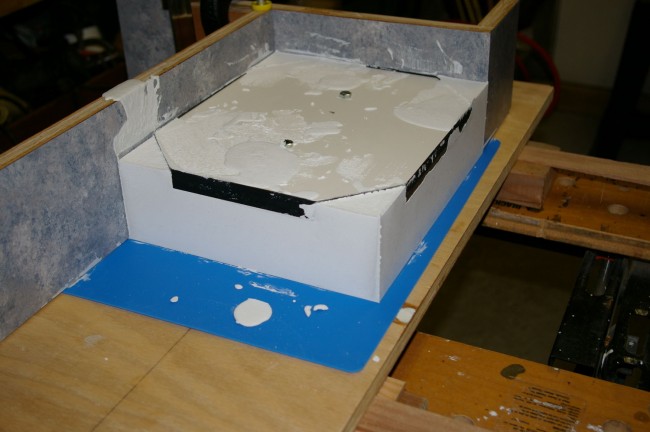
As you can see, the pour was a bit messy! Here, 2 of the sides are removed to expose the freshly born pot.
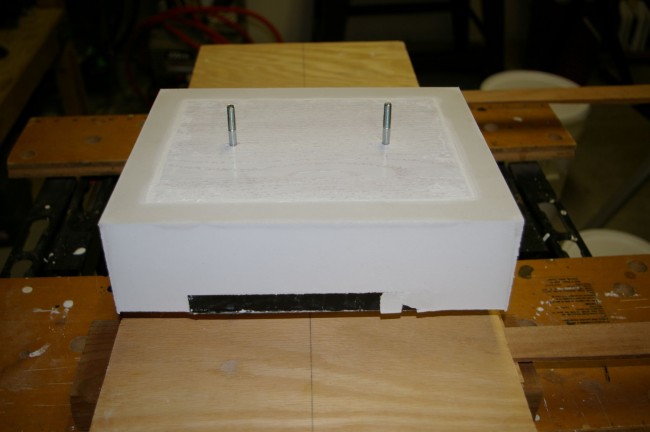
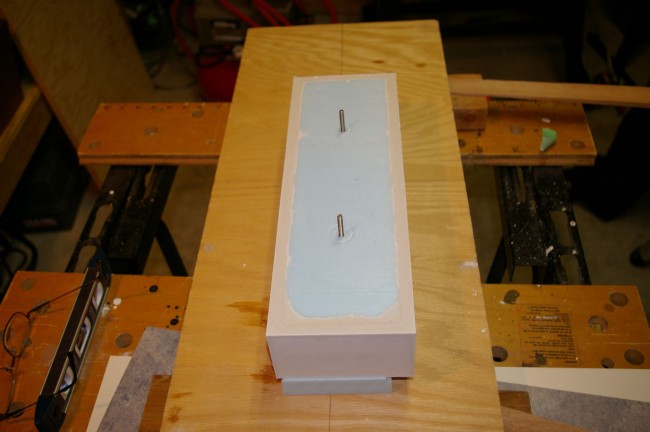
Flipped over to reveal the wood plug and the bolts that held it down. Note the paper-thin leak on the right edge of the electrical tape. Again, this just gets nipped off with an Exacto knife.

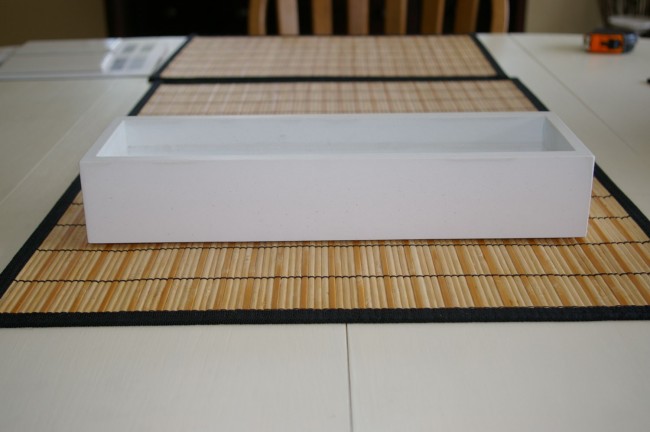
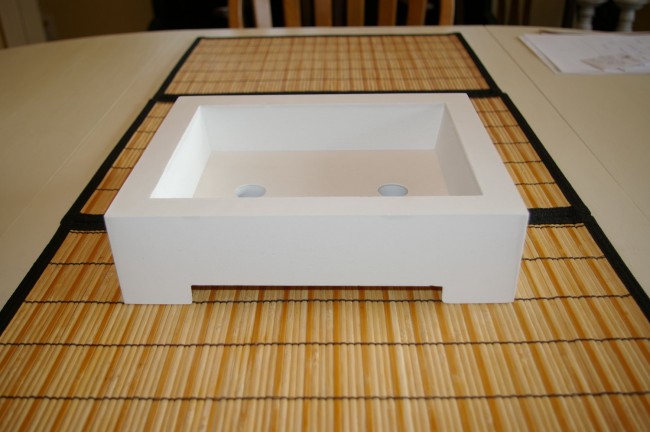
Here is the pot with the plug and top piece (well I guess it was actually the bottom piece) removed. It just needs a very gentle sanding.
I am very happy with the performance of the configurable mold and the pots that have come out of it.
What’s next?
I will be building another pot just like the bonsai pot above for my niece Sarah. Then, I will be trying out some different shapes using a new batch of ‘tan’ colored Kast Krete. As well, the lads at Starpatch Concrete Products sent me a waterproofing additive to try out. I am also designing an indoor fountain and then want to build a large outdoor fountain/bird bath. And, some table lamps!
Once I have made these, I will write a follow-up post with some images and share any other tricks I learn along the way. There are still a few refinements I want to make to the whole process 😉
I hope that you have enjoyed this series of posts. If you make something, PLEASE pop by and share it with us. I’d love to see what you come up with!
Read more in this series:
Part 3 – Concrete Creations: upside-down or right-side-up?
Part 5 – Concrete Creations: Christmas Presents!
Photo Credits
All photos by Gil Namur – All Rights Reserved


I’m going to try my first the styrofoam’s mold insert gave me some a hard time cutting it .
A very nice project! So very pristine and well explained!
I love ‘rustic’ so I’ve been going the other direction… I typically do very meticulous work as a job so I’d rather be less so when having fun
http://www.madebybarb.com/2016/08/04/live-edge-concrete-bowls/
Do you do YouTube videos on this project ?
Hi Charles,
Nope not yet – but I just might in 2017 😉
Happy New Year!
Cheers,
Gil
Cool I’ll be waiting
Also don’t you have to soak the pot in water to leach out some of the lime ?
Nope
I am using a polymer modified concrete. Read A Thinner Mix
http://lifeasahuman.com/2014/arts-culture/creativity/concrete-creations-a-thinner-mix/
Cheers,
Gil
Hi Gil –
Seriously you’re a god send with these posts. Thanks so much for posting all this information. It has inspired me to ask a couple of questions that you may or may not know the answers to: I am looking to make smallish (8″ diameter at the largest) concrete bowls with some glass aggregate in them and have been told the only way to get the aggregate to show up is to grind and polish the bowls once they are done curing. I was told the best tool for this in theory would be some kind of wet grinder but then again wet grinders aren’t really designed to polish surfaces that are rounded. Do you have any insights as to how the surface of a concrete vessel can be polished successfully? I know it can be done as I have seen bowls on etsy described as having been polished. Just can’t figure out how. Also was wondering what your take is on how to achieve *more* bubbles in the surface as opposed to none? I like the look of lots of bubbles (but without a bumpy texture as what happened when you used Pam cooking spray). Someone suggested using a little dish soap in the mix to encourage bubbles for example..
Hi Lauren,
Really not sure how you would do that (expose the aggregate). With the mix I use, I can take it out of the mold in under an hour. If I do that, the outside is still soft – and scrub-able. I have used a scouring pad to expose aggregate that way on a few test pieces under running water and it worked ok. Later, you could use a fine sponge sanding block to smooth it.
As for bubbles … LOL … they are a mystery to me. You can see in my pots bubbles on the inside, which are cool. To get that happening on the outside I have yet to figure out. Dish soap ‘might’ work. Have not tried that. If you do, let me know what happened!
Hope this helps!
Cheers,
Gil
Thank you so much! I will do some experimenting! :))))
Hi Gill, Great ideas. I am going to adapt this techique to some patio hardscape, I want to pour in place sectional concrete pavers in varying widths/lengths and filling the gaps with docorative stone. I like the design you have to get lots of dimensions out of the same mold parts.
I have a suggestion that you can try on your molding projects. Have you tried misting the molding materials in contact with concrete with some spray vegetable oil? This may reduce the concrete bonding to the mold and make unmolding a bit easier and extend the useful life of the molds.
Steve
Hi Steve,
Glad you find them useful. Indeed, I do use a release agent. Indeed, I had started with vegetable oil (also tried mineral oil which worked well) but now am using Smooth-On Universal Mold Release which works great!
Good luck with your project!
Cheers,
Gil
Great tutorials!!! Where can I buy KAST KRETE? How much cost? Was the delivery very expensive?
I try to use white sand with white portland cement for creating white concrete, but it is very difficult to buy them.
THANKS!!!
Hi Mbe,
Thanks for your comment. Glad you enjoyed them. More coming soon!
Suggest you contact StarPatch – http://www.starpatchconcrete.com/contact_us.php
And let them know where you are and they will let you know those details.
I am near Victoria BC and get mine from:
National Concrete.
602 John Street
Victoria, BC V8T1T9 Canada
Tel: (250) 388-4257
http://www.nca.ca/nca/products/default.asp
Hope this helps!
Cheers,
Gil
I need to update my web page to include pics of my mosaic fountains. I gotta get on that!!! – Hope to share real soon!
Let me know when you have!
Do you use FB?
Yes! i could easily send you a pic that way… good – because tackling changing my web page is a huge job!
Cool!
Friend me and I we can share stuff! https://www.facebook.com/gilnamur
And … of course … PLEASE like Life As A Human: https://www.facebook.com/pages/lifeasahumancom/125923222321
As for websites, I know … it’s work! I built Life As A Human and about 200 others 😉
Cheers,
Gil
Hi Gil,
Your posts are a God-send! I’m in the midst of creating cement water features with an upright mosaic cement panel and cement basin. (this is my very first experience with creating a mold and working with cement.) I too want to make boxes (basins) with thinner walls. When you use foam for the basin’s void, how do you remove it? Do you break it apart to remove it and throw away all the chunks or does it come out in one piece and you can re-use it? How deep and large of a basin can you make without reinforcing with wire mesh? I made a 12×12 inch box with sanded concrete. I’m trying to knock out the inner void mold with no luck so far. (i made it from wood). Also – i love that you discovered a pourable cement mix. I made mine last night and had to smush big glops of the stuff. I would much rather pour!
Hi Kris,
Glad that these have been useful to you 🙂
As to the foam, I break it out (cut and pry) and then it’s pretty much useless. I have not made anything deeper than 3″ yet. The mix I use ( http://www.starpatchconcrete.com/PDS/csc-Kast_Krete.pdf ) is fiber reinforced. It’s VERY strong stuff. I hope you are able to get that void cleared! Did you use a release agent?
Cheers,
Gil
I used petroleum jelly on mdf board. I should not have used mdf (it absorbed water and expanded!) I ended up using a saws-all and crowbar to take out the pieces… and then i broke a side off the cement basin in the prying out process- argh! My next attempt will be using the styrofoam on a slightly more petite basin. I’m looking forward to the better results!
Hi Kris,
Bummer! I have used MDF BUT with a melamine coating and that worked fine.
Sorry to hear about the broken piece. Wait till you see my pillar mold article. First attempt was a total failure … BUT … we learn 😉
Cheers,
Gil
Yes – learning all the way. BTW – thanks for sharing your adventure on the web. I really appreciate the details you include!
I have made mosaic pillar water fountains out of pvc pipe. You roughen the surface with sandpaper and use waterproof adhesive and grout then you can run your plumbing up the hollow center. Pretty cool stuff. : )
Thanks for your replies Gil!
:)Kris
Hi Kris,
That sounds cool! Do you have any photos of those up somewhere?
Cheers,
Gil
Hi Thanks for all the info. Now I can build my own bonsai pots will be a great help
thanks
johan. SA.
Hi Johan,
Glad to hear it will be useful to you! Good luck with your bonsai pots … AND your bonsais!
Cheers,
Gil
Hi! thank you for the very interesting post! it has helped me ALOT. I’ve been making cement pots at home and these articles are very cool. I have used plastic tumblers and yoghurt holders as well. People like the items I make with yellow oxide the most whereas I like the plain concrete grey more.
I use ‘Spray & cook’ as a releasing agent, no bubbles. I do find vibrating my soon to be items for approx five minutes, with a sander, gets rids of almost all the bubbles.
Hi Karlien,
Thanks for your comment! Glad to hear these have been helpful to you. Great fun eh! I too use a sander to vibrate the concrete if I am not using the Kast Krete I mentioned in this post:
http://lifeasahuman.com/2014/arts-culture/creativity/concrete-creations-a-thinner-mix/
I will soon post part 5 – I am almost finished my pillar mold and cant wait to try it!
Cheers,
Gil