At the end of my previous post in this series, I showed a picture of a piece of Styrofoam I had cut and said:
“What’s this you ask? This will be used for a water feature – which I will show you in the next post in this series very soon.”
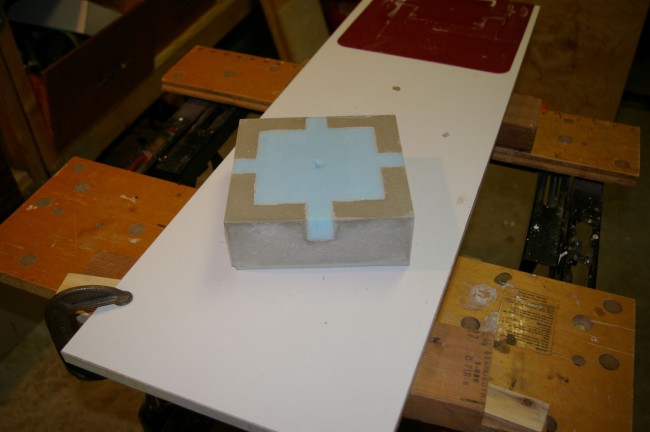
So as promised, here are some pics of the concrete water feature idea I had in mind, and a few others. This is a picture of the foam cavity in part of my configurable concrete mold. It’s being held down to the silicone cookie sheet with a bolt at the top of which is a .75″ (outside diameter) copper plumbing fitting which will be embedded in the concrete. It’s a perfect snug fit for the .625″ (inside diameter) plastic tubing that gets hooked up to the water pump. The concrete is poured to the top edge of that fitting.
Here is the piece after coming out of the mold.
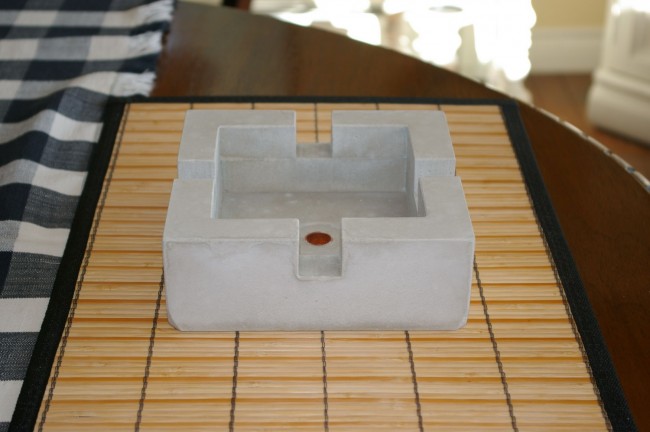
Here it is again after cutting away the foam and a bit of light sanding.
Note: The mix I used was a bit too liquid. See the sanded off lower corners? I had to do that because they were a bit crumbly due to the watery mix. Concrete is interesting and temperamental. Too much water, and the mix takes longer to cure. I took it out a bit to soon. Too much time between making things, and one forgets … well at least I do!
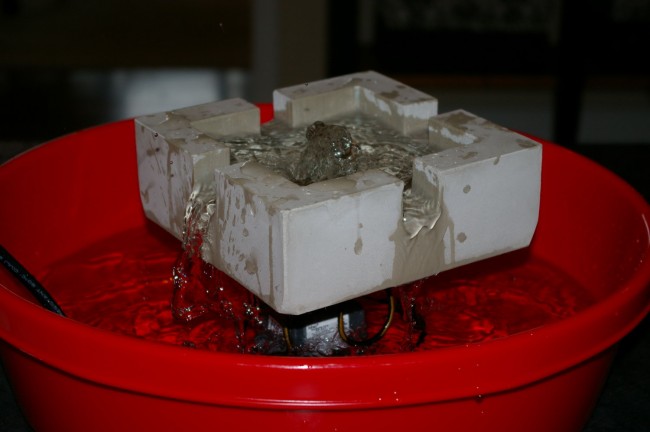
Here it is in action. I used a large round tub to experiment with. This piece would look nice in one or two larger square concrete bases.
Here is the same piece but I added a small spherical bubbler I had made last year to see what it would look like.
This is a concrete millstone I made using a bucket.
And this is a large spherical bubbler I made using two thin plastic 1/2 spheres that used to be covers for ceiling lights.
Here is what the inside looks like. Click on this image for a larger image. I love the way it looks! Like a moon’s cratered surface. I’d love to be able to get the outside to look the same. Something to work on.
Note the copper fitting embedded in the center. Again, a perfect fit for the plastic tubing that connects to the water pump.
And here is a picture of the small and large bubblers side by side. The small bubbler is solid concrete whereas the larger one, as you saw above, is hollow making for a much lighter bubbler, or perhaps a bowl!
When I have built some large basses for these, I will post some images with details on how I made the basses. I hope that these pictures will get your creative juices flowing and I also hope that you will share what you come up with. If you have any questions, please leave me a comment. I’d love to hear from you!
Read more in this series:
Part 6 – Concrete Creations: Making Styrofoam Cavities
Part 8 – Concrete Creations: Concrete Planters
Photo Credits
All photos by Gil Namur – All Rights Reserved


hello sir, i want to ask if you could give tutorials on how to make 3d silicone molds of different polygon shapes for concrete planters, as they are very cheap online , i want to make it by myself . Can you help me out ?
I shall look forward for your reply
Hi Ragini,
I have never made one of those so I can not be of much help.
You could start here though: http://www.homemade-modern.com/ep11-bloktagons/
Hope this helps 🙂
Cheers,
Gil
Those look great! Are you still using the Kast Krete? Was that something you picked up locally or are you able to order it online? I made some hanging planters out of concrete but I’ve been struggling to get a consistent smooth, shiny finish on them. I was hoping the Kast Krete would help.
Hi Kristin,
Thanks for your comment. Indeed I am. Look in this post (scroll to A Thinner Mix) and you will find info on where I got it there.
http://lifeasahuman.com/2014/arts-culture/creativity/concrete-creations-a-thinner-mix/
Are you in Canada? They are in Vancouver.
If you are in the USA, suggest you check out: http://www.shapecrete.com/
I have not tried it yet but it looks very promising.
Hope this helps!
Cheers,
Gil